

Most packaging problems that show up after production actually started at the specification stage, and pouch dimensions are the usual culprit. Order a bag that is a few millimetres too narrow and the fill line slows down; order one too tall and the pack looks half empty on shelf. Getting pouch dimensions right is not a matter of picking a size that looks reasonable from a catalogue. It is a short calculation based on product volume, fill weight, headspace and machine capability.
This guide walks through that calculation in the order a packaging engineer would do it, and flags the allowances that are most often forgotten.
Start With the Product, Not the Bag
Before any dimension is chosen, define what goes inside: fill weight, bulk density, piece size and whether the product settles. A 500 g fill of ground coffee, whole beans and instant powder occupy very different volumes for the same weight, because bulk density ranges widely.
Also decide how the pack will be filled. Manual filling leaves more headspace than an automatic auger filler, and a pouch that will be filled on a form-fill-seal machine has to match the machine’s jaw width and film path. The filling method often constrains the dimensions more tightly than the product does.
The Four Numbers That Define a Pouch
Every flat pouch is defined by four numbers: finished width, finished height, bottom gusset depth and, for stand-up structures, the bottom fold geometry. Width and height set the printable face; gusset depth sets how much the pack can expand and how stable it stands.
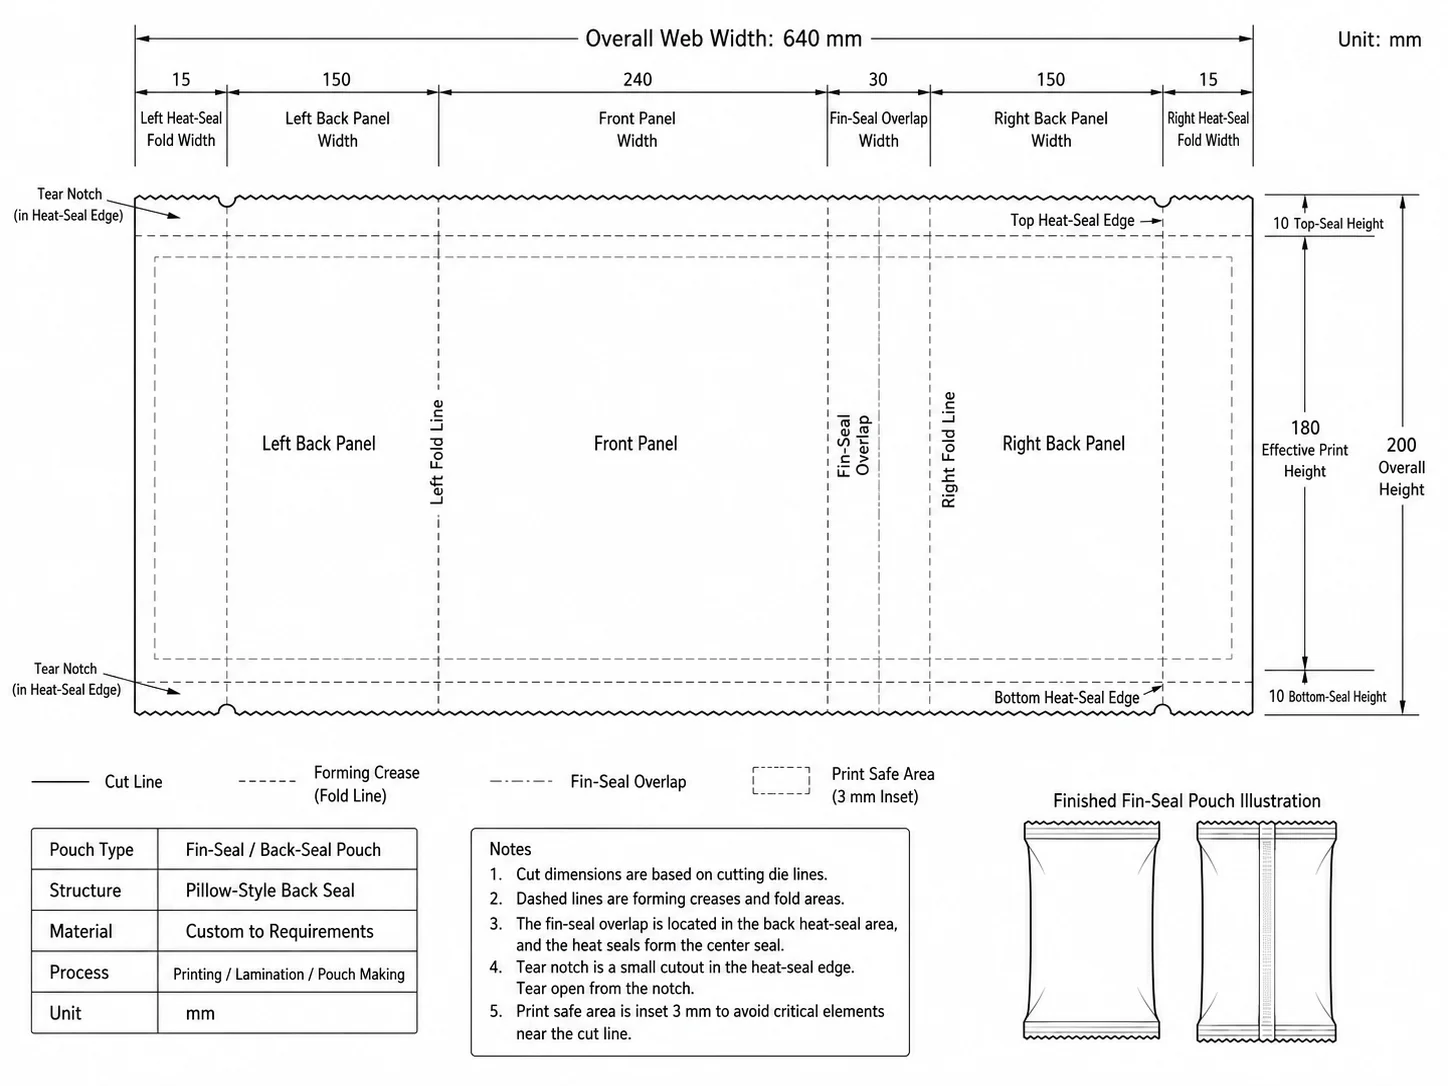
Two more numbers matter for production: seal width and the distance from the top seal to the tear notch or zipper. A seal that is too narrow leaks; too wide wastes film and can interfere with easy-open features. If a zipper is part of the design, its position changes the usable fill height, which is why zipper selection should be settled before dimensions are locked. Our zipper pouch selection guide covers the trade-offs.
Converting Fill Weight Into Volume
The practical route is to measure, not guess. Fill a sample of the product into a measuring container at the target weight, tap it lightly to simulate transport settling, and read the volume. Divide that volume by the usable pouch volume derived from the dimensions, then add a headspace allowance.
As a starting rule, usable volume for a flat pouch is roughly width times fill height times gusset expansion, adjusted by a fill factor between 0.75 and 0.9 depending on how freely the product flows. Powders pack efficiently and can sit near the top of that range; irregular snacks and frozen pieces need the lower end because they bridge and leave voids.
If the calculation lands close to the limit, size up. A pouch that is slightly too large still works; one that is slightly too small causes spills, seal contamination and complaints.
Allowances People Forget
Headspace is the first. You need room for the product to move during transport, for a nitrogen flush if the pack is gas-flushed, and for the top seal to stay clean. Cutting headspace to save film is the most common cause of seal failures in transit.
The second is the bottom gusset. A stand-up pouch needs enough gusset depth to create a stable base once filled; too shallow and the pack tips over on shelf. The relationship between gusset depth and finished height determines standing stability more than overall size does.
The third is fill tolerance. If the filler varies by several grams per cycle, the pouch must accommodate the upper end of that range, not the average. The fourth is the label or print area: decorative panels shrink faster than you expect once seals and gussets are folded away.
Common Sizing Mistakes
Sizing from a competitor’s pack without measuring its fill weight is the most frequent error; a similar-looking bag may hold thirty percent more or less. Specifying dimensions from a flat artwork file without accounting for seal areas is the second. The third is ignoring how the pack will be displayed: a pouch that looks right standing alone can disappear behind a wider neighbour on shelf.
There is also a machine-side mistake. Dimensions that are perfectly reasonable for a manual fill line can be impossible on an existing vertical form-fill-seal machine, whose jaw width and film width are fixed. Confirm machine compatibility before approving a dieline.
Test Before You Commit
Ask for a physical sample in the intended film structure, not a paper mock-up. Fill it to the target weight with the real product, seal it on the intended equipment, and run a drop test and a twenty-four hour compression test. Check that the pack stands, that the seal is clean, and that the fill line can hit rate.
If the product is frozen or vacuum packed, the test needs to include the temperature range, because film stiffness changes dramatically at low temperature. Our comparison of vacuum sealed bags for home and industrial use shows how much the same nominal size can differ once the process changes.
Next Step
Write down fill weight, bulk density, filling method, machine jaw width and required shelf life. Those five data points are enough to size a pouch properly, and they turn a vague request into a specification a converter can quote against.
Send them to our team through the PURESTPACK contact page and we will return a recommended dieline with material structure and volume check. More technical references are available on PURESTPACK.com.