
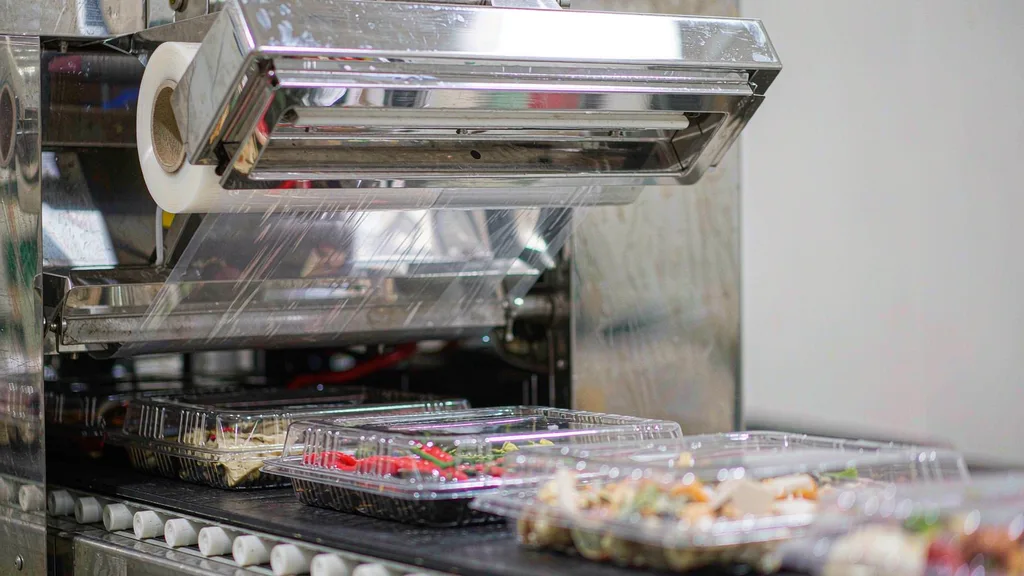
Specify tray lidding film in four steps: match the sealant to the tray material, choose peel or lock with a peel-force number, add anti-fog only where condensation is real, and set seal temperature, dwell and pressure as a tested window. Skip any one of those and the line pays for it in rework.
What Tray Lidding Film Actually Has to Do
A lidding film is the closure of a rigid tray. It does four jobs at once, and most failures come from specifying only one of them.
- Seal to the tray flange across a flat, often contaminated surface, at line speed.
- Open the way the consumer expects — clean peel, or a locked seal that must be cut.
- Carry the barrier load, because the tray body is thick but the lid is thin.
- Look right on shelf, which for chilled product means staying clear instead of fogging.
Unlike a pouch, the film is sealing against a flange that is frequently wet, greasy or dusted with powder. That single fact drives most specification decisions.
Match the Sealant to the Tray Material
The sealant layer must be chemically close to the tray surface. Pair them wrong and no amount of heat will produce a consistent bond.
| Tray material | Typical use | Matching sealant | Notes |
|---|---|---|---|
| PP tray | Hot fill, microwave, ambient | PP / PE coex sealant | Widest sealing window, forgiving |
| APET tray | Chilled, fresh, MAP | Speciality PET-compatible sealant | Narrow window, needs tight control |
| CPET tray | Ovenable to 220°C | High-temperature sealant | Dual-ovenable, highest cost |
| PE-coated board | Bakery, short shelf life | PE sealant | Cheapest, lowest barrier |
| Aluminium tray | Ready meals, retort | High-temp lacquer system | Check lacquer compatibility |
Ask the converter to confirm the sealant grade against the actual tray resin. Trays from two suppliers with the same nominal material can behave differently because of masterbatch and surface treatment.
When Product Sits on the Flange
Flange contamination is the most common cause of leakers on a tray line. Marinade, brine, fat and powder all end up on the sealing surface.
- Specify a seal-through-contamination grade: ionomer or metallocene sealants maintain bond strength over a contaminated flange where standard PE fails.
- Use serrated or profiled sealing tools. The profile pushes liquid out of the seal band instead of sealing over it.
- Keep flange width at 6–10 mm. Narrow flanges look better but leave no margin for contamination.
- Fit a flange wipe or air knife before the sealing head. It is a cheap fix that removes most of the problem.
Peel or Lock: Put a Number on It
“Easy peel” is not a specification. Peel force is.
- Easy peel: 3–8 N/15 mm. The lid lifts by hand without tearing and without leaving film residue on the flange.
- Medium peel: 8–15 N/15 mm. Holds through distribution but still opens by hand with effort.
- Locked seal: 15–25 N/15 mm and above. The film tears rather than peels; used where tamper evidence matters more than convenience.
Two failure modes show up repeatedly. Peel force that drifts upward over a production run means the sealing temperature is creeping up, which cross-links the sealant and reduces peelability. Peel force that varies across the tray means uneven pressure or a warped tool. Both are measurable in five minutes with a tensile tester running ASTM F88.
Anti-Fog: Why It Works and When It Stops
Anti-fog is a surfactant additive that migrates to the film surface and spreads condensed water into a transparent film instead of droplets. It does not stop condensation — it makes condensation invisible.
- It is required for chilled and fresh product where the pack moves between cold rooms and ambient shelves.
- It lasts roughly 3–12 months depending on the additive package, storage temperature and product contact. Fatty or acidic products strip it faster.
- Anti-fog sits on the inner surface. Specify which side, because a film with anti-fog on the wrong face does nothing.
- There are two families: standard anti-fog for cold fill, and hot-fog grades for hot fill and microwave. Using a cold-fill grade on a hot-fill line is a common and avoidable error.
For lines running both fresh and frozen, buy one film with the wider grade and accept a small premium.
Line Settings: Set a Window, Not a Number
Record temperature, dwell and pressure as a tested plateau, not a single set point.
- Temperature: typically 140–200°C at the tool, depending on sealant and tray. Start from the sealant supplier’s curve, not from the previous product’s setting.
- Dwell: 0.5–2 seconds. Longer dwell raises peel force and reduces output.
- Pressure: enough to hold the tray flat without crushing the flange; uneven pressure is the main cause of corner leaks.
- Tool flatness: carbon paper once a week. Warped tools cause leaks no film change fixes.
Run a seal-strength curve at three temperatures at start-up, then confirm peel force every 30 minutes for the first hour. That discipline catches drift before it becomes a pallet of rework.
What to Test Before Signing Off a New Film
A qualification run should close four questions before the film goes into production.
- Seal strength: ASTM F88, with a defined minimum and a maximum for peelable grades.
- Leak detection: ASTM F1929 dye penetration on 32 trays per trial, zero channel leaks.
- Barrier: oxygen transmission by ASTM D3985, matched to the shelf-life target and the tray’s own contribution.
- Distribution: one pallet through your actual cold chain, then check corners and seals before release.
For the barrier half of the specification, the approach in MAP packaging film: what a food factory should specify applies directly to lidding film. Peel-force targets are covered in more detail in peelable vs locked seals, and leak-test selection in seal integrity testing methods compared.
Cost and Ordering Notes
- Lidding film is priced by square metre, not by tray. A 5 mm flange reduction across a high-volume line is a real annual saving.
- Printed lidding adds a plate or cylinder cost. Above four SKUs, ask for digital print or shared cylinders.
- Minimum orders follow extrusion length, typically 500–1,000 kg per structure.
- Hold one qualified alternative film per tray type. A single-source lidding film stops a line completely when supply breaks.
Frequently Asked Questions (FAQ)
What is tray lidding film?
Tray lidding film is the flexible film heat-sealed to the flange of a rigid plastic tray to close the pack. It provides the seal, the barrier, the opening experience and the visual clarity of the finished pack, and it is specified by sealant type, peel force, barrier level and anti-fog performance.
How do I choose between easy peel and locked seals?
Choose easy peel when the consumer opens the pack by hand and eats from it, with a peel force of 3–8 N/15 mm. Choose a locked seal at 15–25 N/15 mm and above when tamper evidence, leak resistance or oven use matters more than convenience.
Why does my lidding film fog up on shelf?
Either the film has no anti-fog grade, or the anti-fog is on the wrong face, or the additive has been stripped by a fatty or acidic product. Check the additive side first, then review whether the product contact is shortening the additive’s effective life.
Can one lidding film seal both PP and APET trays?
Rarely, and never reliably at high speed. PP and APET need different sealant chemistry. A universal film usually means a wide sealing window on one material and a marginal seal on the other, which shows up as intermittent leakers.
What seal temperature should a tray sealer use?
Start from the sealant supplier’s curve, typically 140–200°C at the tool, then run a seal-strength curve at three temperatures and pick the plateau where peel force is stable. Do not copy the setting from a different product or tray.
How long does anti-fog last?
Typically 3–12 months, depending on the additive package, storage temperature and product contact. Fatty and acidic products reduce it. Ask the supplier for a stated duration and test it on your own product rather than accepting a generic figure.
How do I stop corner leaks on trays?
Corner leaks are usually mechanical: uneven pressure, a warped tool, or a flange that is too narrow for the contamination level. Check tool flatness with carbon paper, widen the flange to 6–10 mm, and add a flange wipe before the sealing head.
Two related reads from the brand side: nut packaging: managing oxygen, oils and reclosing and shelf life and best-before dates.