
Seal integrity testing answers one question: does this package leak, and by how much. Bubble emission (ASTM D3078) finds leaks above roughly 10⁻³ mbar·L/s, dye penetration (ASTM F1929) shows channels around 50 µm at the seal edge, and vacuum decay (ASTM F2338) measures non-destructively down to 10⁻⁶ mbar·L/s. Choose by defect type, line speed and whether the pack can be destroyed.
What Seal Integrity Testing Actually Measures
A seal can pass a visual check and still leak. Leaks come from four places: a channel across the seal caused by product contamination, an incomplete seal from low temperature or short dwell, a pinhole or flex crack in the film, and a puncture from sharp product. Seal integrity testing detects the leak; seal strength testing (ASTM F88) measures how much force the bond holds. Both are needed, because a strong seal can still leak through a channel.
The Four Methods Compared
| Method | Reference | Detects | Throughput | Best for |
|---|---|---|---|---|
| Bubble emission | ASTM D3078 | Leaks ~10⁻³ mbar·L/s and larger | 20–60 s per pack | Troubleshooting, root cause location |
| Dye penetration | ASTM F1929 | Seal channels ~50 µm and larger | 1–5 min per sample | Seal-area defects, process validation |
| Vacuum decay | ASTM F2338 | Down to ~10⁻⁶ mbar·L/s | 5–20 s per pack | Inline or at-line screening, no pack loss |
| Burst / internal pressure | ASTM F2054, F2096 | Gross leaks and weakest-seal location | 30–60 s per pack | Setting seal parameter limits |
Bubble emission testing (ASTM D3078)
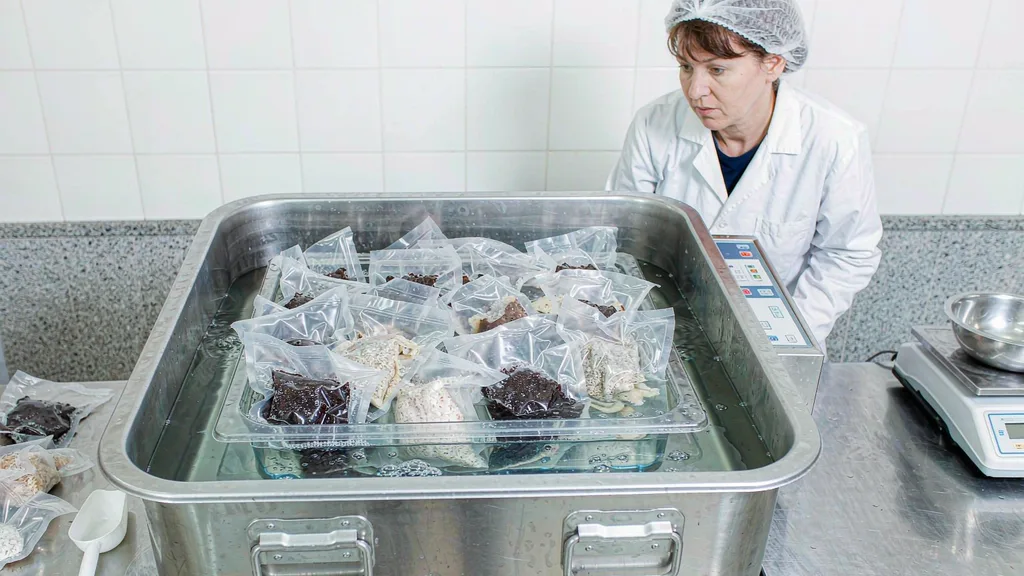
The pack is submerged in water inside a vacuum chamber, vacuum is applied — commonly in the 200 to 500 mbar range — and held for about 30 seconds. A continuous stream of bubbles marks the leak. The operator sees the location, which makes this the fastest route to a root cause on the line.
Limits: it is destructive to the pack, operator-dependent, and it will miss very small leaks. It is a diagnostic tool, not a screening tool.
Dye penetration testing (ASTM F1929)
A low-surface-tension dye solution is applied to the seal edge and the seal is inspected for dye travelling across the seal width. Because the test is read at the seal, it is the standard way to prove a sealing process, not just an individual pack. It detects channels around 50 µm and larger.
Limits: results depend on dwell time before reading and on the dye wetting the channel. Wide seals with heavy contamination are the usual failure.
Vacuum decay testing (ASTM F2338)
The pack sits in a sealed test chamber, the chamber is evacuated, and the instrument measures pressure rise over a fixed cycle. No water, no dye, no destroyed pack — which is why vacuum decay is the usual choice when a factory wants to test more than a token number of packs per shift.
Limits: large headspace packs and very flexible films take longer to stabilise, and fixtures must match the pack size. Calibrate the instrument with a known-orifice standard, not with a good pack.
Burst and internal pressure testing (ASTM F2054, F2096)
Air is injected into the pack until it fails. The pressure at failure and the failure location tell you the weakest point of the seal, which is exactly what you need when setting heat seal parameters. Pair this with peel testing so you know both where it fails and how much force it takes.
How to Build a Sampling Plan That Catches Real Failures
Testing random packs at random times finds nothing. Sampling on events finds failures:
- Start of every shift, after any jaw warm-up
- After every product, film lot or jaw changeover
- Every 30 to 60 minutes during a run, two packs per sampling point
- Immediately after any jam, film splice or stoppage longer than a few minutes
- On retained samples after 24 hours, because some cold seals open later
Record five fields per test: time, SKU, film lot, machine and jaw settings, result. Without the settings column you cannot correlate a leak to a parameter drift, and the test becomes paperwork.
What Causes False Failures and False Passes
Most bad decisions in seal integrity testing come from the test, not the pack:
- Trapped air in a gusset reads as a leak in vacuum decay; vent the fixture or extend stabilisation time
- Product in the seal area produces a channel that dye shows clearly but bubble testing may miss if the channel is long and slow
- Over-tight fixtures deform the pack and close small leaks
- Cold packs straight from a chilled line condense in a water bath; let them reach ambient before bubble testing, which is routine on frozen food packaging lines
- Operators reading bubbles too early see the initial outgassing of the pack, not a leak
Setting an Internal Specification
Write the limits down before the audit, not during it. A workable starting point for a food pouch line:
| Check | Method | Starting limit |
|---|---|---|
| Seal strength | ASTM F88 peel, 15 mm strip | Minimum set from qualification data; track the spread across six samples |
| Leak | Bubble, 200–500 mbar, 30 s | Zero continuous bubble streams |
| Seal channel | Dye penetration | No dye crossing more than a defined fraction of seal width |
| Gross leak | Internal pressure | No failure below the pressure set during qualification |
The numbers should come from your own qualification run, then be tightened once the process is stable. See the packaging film qualification protocol for how to generate that baseline without stopping production.
Connecting Test Results Back to the Sealer
Leak data is only useful if it changes a setting. The mapping is usually direct:
- Leaks at the same corner every time: jaw pressure uneven or jaw faces worn
- Leaks through product: filling level too high, or seal area contaminated before closing
- Random leaks across the seal width: temperature too close to the lower edge of the seal window; see heat seal parameters troubleshooting
- Leaks after transit but not at the pack line: seals too narrow or too brittle, often after downgauging the film
Bag geometry changes the pressure a seal sees in handling, so re-verify after any size change — the stand-up pouch sizing guide shows how gusset and fill level shift the load on the seal.
FAQ: Seal Integrity Testing
What is the difference between seal integrity and seal strength?
Seal integrity asks whether the package leaks; seal strength asks how much force the sealed bond holds before separating. ASTM F88 measures strength by peel, while ASTM D3078, F1929 and F2338 are integrity or leak methods. A seal can be strong and still leak through a product channel.
Which seal integrity test method is best for a food factory?
Use vacuum decay for routine screening because it is non-destructive and fast, and keep bubble testing as the troubleshooting tool when you need to see where the leak is. Dye penetration belongs in process validation, not in daily checks.
How often should pouches be leak tested?
At minimum at shift start, after every changeover and every 30 to 60 minutes during a run, with two packs per point. Add a test after any stoppage or film splice, and re-test retained samples after 24 hours to catch cold seals.
Can seal integrity testing replace a shelf life study?
No. Leak testing confirms the package is closed; shelf life testing confirms the product stays acceptable inside it. A pack can be leak-tight and still fail on moisture or oxygen ingress through the film, which is a barrier question, not a seal question.
What leak size actually matters for food pouches?
It depends on the product. Dry snacks tolerate much larger defects than liquid or modified-atmosphere packs, where even a small leak collapses the gas mix. Set the limit from your qualification data per product, not from a generic number.
Why do packs pass the bubble test in the lab but leak in transit?
The bubble test is a snapshot at ambient conditions. Transit adds vibration, stacking load and temperature cycling, which open seals that were marginal — typically too narrow, too hot, or made through contamination. Add a post-transit leak check to your validation for products shipped long distances.
Is vacuum decay sensitive enough for small sachets?
Yes, small-format packs suit vacuum decay well because the headspace is small and stabilises quickly. The constraint is the fixture: sachets need a chamber matched to their size, otherwise the measured volume is dominated by the chamber rather than the pack.